Joe Walsh Contractors
401-447-3605
jwalsh3032@yahoo.com
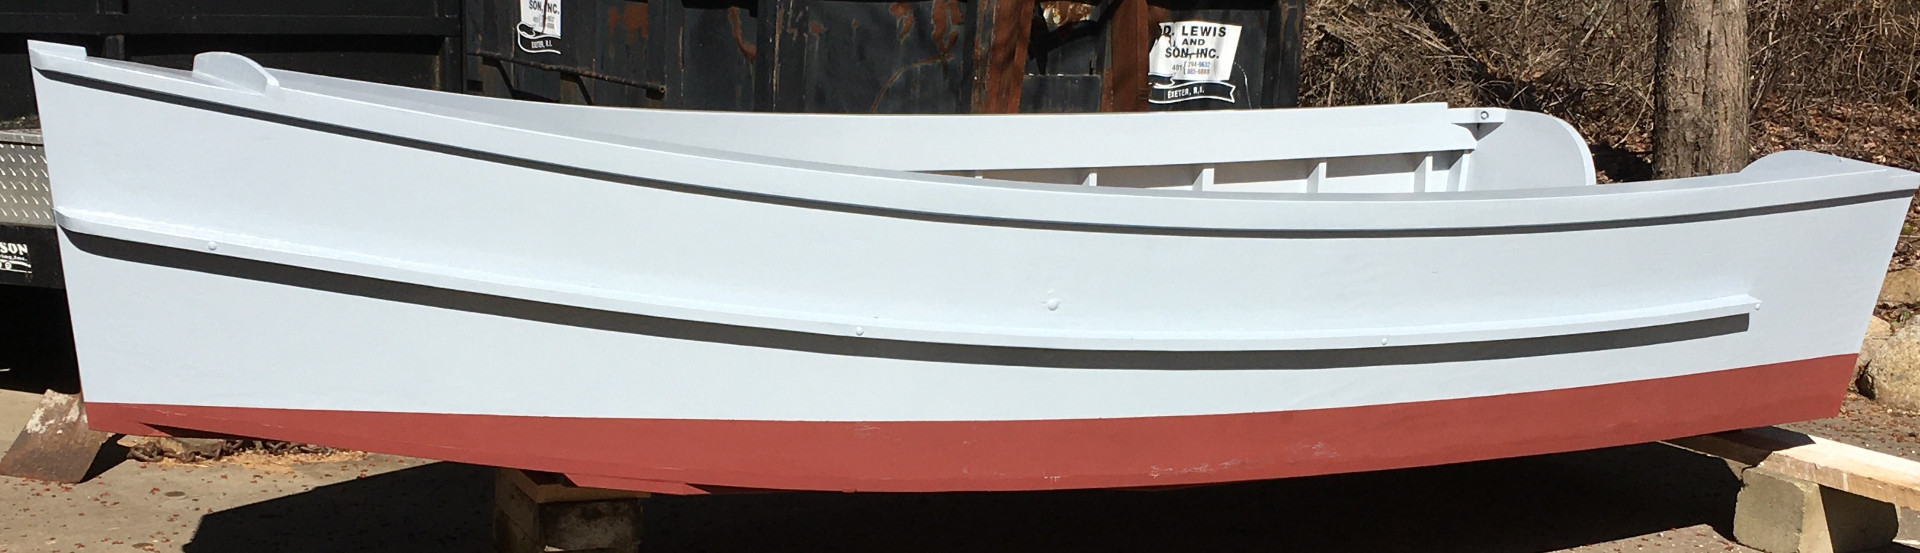
1950's vintage Zube style work skiff
(Zoo-Be)
For years I have told people when they asked how I learned carpentry skills, that I learned primarily building and repairing boats as a kid. Other than that and occasional reminisces at family gatherings, I hadn't thought much about it in 50 years. That is until January of this year. My son in law Ben, who works at Mystic Seaport, asked me to help him document these boats, for a historical record. We went out trying to locate any of the originals and fairly quickly realized there are none! We sat down and I told him the stories I remembered from my teenage years and we decided maybe I should write it out as a kind of historical narrative from memory. When I was in my teens and even a little before that this was all I did and all I really cared about. In the process of this I wrote out histories as I remembered it, of 2 styles of skiffs. This is one of them and in fact was far and away the most prevalent in the west bay in the 1960's when I was growing up. As I did the narrative I also did some drawings to scale as explanation. At that point I realized I could remember more than enough to re-create these boats. In early March I "mocked up" a full size boat out of firring and 1/4" luan plywood which was to prove to myself basically that I did remember all I thought I did. At that point I began to gather what material I thought I would need. Some of the old material is no longer available, for example 16' sheets of marine plywood. I had to scarf 2 sheets together to get the long sheet I needed. Just about the time I was ready to go, Covid 19 came along. Due to my at risk status for the virus, and the nature of the work we were doing at the time, I closed down our jobs. Consequently I had plenty of time to work on this boat!
I've taken pictures of the entire process and posted a representative group here. This one is the smallest of this style and is a 14'version. The actual overall length is 13'9" just as the originals were. (The boat length by name is taken by the length of material used for the sides.) The smallest engine I ever had on one this size was a 40hp. However, that made for a pretty quick boat, in the same ballpark, if not a little faster than a 13' Boston Whaler of the time with similar power. For me what I learned building and repairing these boats as a kid is irreplaceable. First and foremost "good enough" does not work building a boat. Good enough is synonymous with the words leak, sink, popped plank and many others with similar disastrous results on the water! Believe me I tried all the shortcuts I could when I was 13 or 14. Fortunately the resulting near disasters all took place fairly close to shore! This boat will end up on Tiogue lake in Coventry. Considering it is designed for the seas of Narragansett bay it is grossly overbuilt for the lake, but should be very happy and grow very old there!
Mock-up of boat out of firring and luan plywood. Below: Because I had made the mock up I cut chines for the actual boat to the mock-up, and used mock up as template for sides.
Lack of availability of 16' sheets required employing some old school low tech scarf jointing. Photos Below from upper left: skill saw set up with wood aux. base cutting many cuts across sheet. Middle: plywood after saw cuts, being planed smooth. Right: sheets are glued up and clamped (using epoxy). Bottom center: sheet is glued up ready to be cut
Below left to right: Sides are cut, Center: stem and side drilled and laid side by side. Right: first side is bedded and screwed to stem.
Below left: sides are wrapped around forms and screwed to transom. Center: ribs are installed. Right: string is run from the center of the stem to the center of the stern to check and adjust for symmetry.
Below Left: Assembled oak transom 1-5/8" thick. Center: Cutting stem for bottom using old school rip saw. Below right: Finished cut of stem for bottom tie in.
Below left: first layer of spray rail installed. Center: spray rails done ready for bottom. Lower right: Interior primed with epoxy primer, ensuring bottom end of ribs are sealed.
Below left: 5/4" x 4" fir bottom planks rough cut and fitted. Below right: bottom install in progress. Notice extended clamps
Below left: Bottom install continues. Note push clamps. Below right: Bottom is fully fastened to chines #12 stainless screws
Below left: Bottom planks trimmed flush and batten for center sand board layout in place Below right: 5/4" x 4" oak sand boards being installed.
Below left: sand boards finish up. Below center and right: 2" x 3" oak skegs are installed. (skiffs actually built by Hackey Zube would have had one single skeg in the center. I used 2 because this boat won't be used for working and will be pulled up to the beach regularly. Double skegs allow boat to remain level side to side and prevent sand damage to the edges of the bottom.)
Below left: boat is taken outside and flipped right side up. Below right: Back inside ready for topside work
Below left: breast lock is installed. Below center: Top of stem is shaped using rip saw. Below right: Rear oak gunnel knee at transom
Below left: Outer oak gunnel rail in place. Bow section is tapered over a 5' section to aid in bending. Below right: Primary inner oak gunnel rails in place.
Below left: cutting oak Gunnel cap. Notice the curve is cut with a skill saw. Below right: Installed gunnel cap at joint.
Below Left: gunnel cap installed on left side. Below right: Gunnel caps and secondary inside gunnel rails complete.
Below left: Structural 1-3/8" thick oak knee is drilled. Below right: Knees installed
Below left: bottom is screwed to sand boards, paint complete. Below right: waterline and paint complete.
Below left: bow rope locker in place. fir is coated with pine tar and linseed oil. Below right: seat in place also coated with pine tar and linseed oil. (Original Zube skiff would have had no seats or rope locker)
Below left: seat, (left side lifts out for bailing.) Below right: exterior with motor installed
Our old school skiff in it's permanent home on Tiogue lake
with 1994 20 hp Johnson
A lot of room for a little boat!
See trailerable 16'and 18'versions at bottom of page
16' trailerable version
These skiffs as they were built originally were intended to be left in the water, year round in many cases. The fir plank bottoms would swell up and stay that way. As a kid I built one boat with a plywood bottom. This gave me the idea to build one now using the highest grade 13 ply 3/4" merrante marine plywood for the bottom so the boat could be trailered without having to fill it with water every time you came back from a trip. The bow seat lifts out and can be stored when not in use. Below are some pics of this boat.
Coming in on a 30 degree November morning!
Last trip of the season Nov. 20, 26 deg. Frost on
windshield and dock!
18' trailerable version
This boat is similar in construction and materials to the 16' version above except it is 18' and is more in the style of the boats used by many of the quahoggers who worked out of Apponaug Cove in the 1960's. Although its a couple of inches wider than the 16' version, in scale, its a little narrower than an 18' Zube style would be. I built this one for myself and use it for both fishing and quahogging and the occasional trip to the Maine lakes for freshwater fishing.
The main differences are that this is about 3" deeper than the Zube boats, there are bolted and screwed stern posts. The spray rails run stem to stern at a slightly higher level and add structural support to the stern.
Putting the skiff to use as it was originally intended, early March 2023. Finishing up a day of bullraking
A friend found this image of me coming in from a days fishing 2022